The integration model for research proposed by D.A. Bernstein and T.D. Brokovec is indicated for explain to the patients, in a first session, what the different steps they are going to follow to relax. This fragment I think clearly explains the proposed method. After the explanation, the clients would be satisfied with any type of question or doubt they might have; He is given permission to go to the toilet, unbutton his clothes, get comfortable, etc., and then the training session begins. Next, in Online Psychology we will explain in detail the Bernstein and Brokovec relaxation techniques.
Index
- Example of standard relaxation with Bernstein and Brokovec techniques
- Muscle group charts for relaxation training
- Relaxation techniques model proposed by J.R.Cautela and J.Groden.
- Muscle relaxation technique
- Relax your arms
- How to relax your chest
- Stomach relaxation
- Relaxation of the muscles below the waist
- How to relax your legs
- Face relaxation
- Relax neck
- Shoulder relaxation
- Stage 1 of the model proposed by T. Carnwath and D.Miller.
- Stage 2 of the relaxation model of T. Carnwath and D. Miller
- Stage 3 of the relaxation model of T. Carnwath and D. Miller
Example of standard relaxation with Bernstein and Brokovec techniques.
"Procedures in progressive relaxation. They were first developed in the 1930s by a physiologist named Jacobson, and in recent years we have modified his original technique to make it simpler and more effective. Basically the progressive relaxation training consist of learning to tense and then relax, sequentially, various muscle groups throughout the body, in addition to teaching you how to relax, we will also stimulate you to learning to recognize and discriminate tension and relaxation, without your active cooperation and regular practice of the things you will learn today, the procedures will be of little use. progressive relaxation, we want you to learn how to produce larger and more obvious stress reductions and the best way to do this is to first produce quite a bit of tension in the group of muscles.
"We will start by training the hand and forearm. I will ask you to tense the muscles in your right hand and forearm by clenching your fist. Now you should be able to feel the tension in your hand, in your knuckles, in your forearm. Can you feel that tension? Okay, fine. After we have relaxed that group of muscles, we will go to the one with the right biceps and I will ask you to tighten it by pushing your elbow against the arm of the chair. You should be able to get a feeling of tension in the biceps without including the muscles of the forearm and hand. Can you feel the tension there now? After we have completed the relaxation of the hand, forearm and right biceps, we will move to the muscles of the left hand and forearm, tensing and relaxing them in the same way as in the arm right. Also, we will tense and relax the left bicep muscles just as we did with the right. "
"After we have relaxed the arms and hands, we will relax the muscles of the face and, for conceptual purposes, we are going to divide them into three groups, first, the muscles of the area of the face. forehead (upper part of the face), then the central part (upper part of the cheeks and nose), and finally the lower part (jaws and lower part of the cheeks)". We will start with the muscles in the upper part and I will ask you to tighten them by raising your eyebrows as high as you can, generating tension in the forehead and upwards, in the region of the scalp. Can you feel that tension now?
"Very well. Now we will go down to the muscles of the central part of the face. To tighten these muscles I will ask you to squint and at the same time wrinkle your nose, obtaining tension in the central part of your face. Can you feel the tension here, now? OK, very good. Then we will tense the muscles of the lower part and to do this I will ask you to clench your teeth and bring the corners of your mouth back. You should feel tension in your lower face and jaws. Do you feel the tension in this face area now? "" Good. After we have completed the facial muscles we will relax those of the neck and, to achieve this, I will ask him to push his chin down against his chest, and at the same time really try to keep him from touching the chest. That is, I want you to contrast the muscles in the front of the neck with those in the back. You should feel a little shaking or shaking in these muscles when you tense them. Can you feel that now? "
"Okay, fine. We'll move on to the chest, shoulder, and back muscles. We are going to combine a few muscles here and I will ask you to tense them by taking a deep breath, holding it and at the same time placing the shoulder blades together, that is, bring the shoulders back and try to get the shoulder blades touch. You should feel significant tension in your chest, shoulders, and upper back. Can you feel that tension, now? Okay, fine".
"We will move to the muscles of the abdomen and to tighten them I am going to ask you to make your stomach hard, make it tense as if you thought you were going to be hit on it. You should feel great tension and tightness in your stomach area. Can you feel that tension, now? Very well".
"After relaxing the stomach muscles, we will move on to those of the legs and feet and begin with the upper part of the right leg and thigh. I'm going to ask you to tension the upper part of the right leg by contrasting the long muscle on top of the leg with the smaller ones in the back. You should feel like the big muscle at the top is hard. Can you feel it, now? Very well".
"Now we are going to move on to the muscles of the right calf, the lower part of the leg and I will ask you to tighten the muscles here by pulling the fingers up towards the head. You have to feel the tension through the entire calf area. Can you feel that tension, now? OK, very good. Now, you are going to put tension on the muscles of the right foot and to do this you have to stretch the tip of the foot, turning it inwards and curving the toes at the same time. Don't strain your muscles too tightly, just enough to feel the strap under the arch and on the ball of the foot. Do you feel the tension, now? Very well".
"We're going to target the muscles in the upper left leg by tensing and relaxing them just like we did on the right side. Then we will continue with the muscles of the lower part using the same procedures. that we use on the right side and finally the left foot, tensing and relaxing it mode".
"Another important point to remember is that I hope you will immediately remove the tension that builds up in those muscle groups when prompted. Please don't let the tension gradually dissipate. For example, when you have been tensing the muscles in your right hand and forearm, I will ask you to relax, and When I ask for it I would like you to completely or immediately discharge all the tension that you have in these muscles. Don't gradually open your hand, let all the tension go at the same time. "
"Once we have relaxed a group of muscles it is better if they do not move. Don't be afraid to move, but don't make unnecessary movements during the session. I am also going to ask you not to speak during the session, you will communicate with me by means of hand signals. ".
The authors also propose a series of alternative strategies for those clients who cannot perform the type of exercises proposed or have difficulty getting tension through procedures represented. According to these authors, training has three phases: in the first, the client is taught the relaxation on 16 muscle groups, continuing with the learning of the relaxation on 7 muscle groups and finally the practice boils down to 4 muscle groups.

Muscle group charts for relaxation training.
Below we collect the tables corresponding to the different phases of training (taken from J.M. Buceta et al., 1989).
Table 1. Muscle groups proposed by Bernstein and Borkovec (1973)
- Dominant hand and forearm
- Dominant biceps
- Non-dominant hand and forearm
- Non-dominant biceps
- Front
- Upper part of the cheeks and nose
- Lower part of the cheeks and jaws
- Neck and throat
- Chest, shoulders and upper back
- Abdominal or stomach region
- Dominant thigh
- Dominant calf
- Dominant foot
- Dominant thigh
- Non-dominant calf
- Non-dominant foot
Table 2. Muscle groups proposed by Bernstein and Borkovec (1973)
- Dominant hand and arm
- Dominant hand and arm
- Expensive
- Neck and throat
- Chest, shoulders, back and abdomen
- Dominant foot and leg
- Non-dominant foot and leg
Table 3. Muscle groups proposed by Bernstein and Borkovec (1973)
- Hand and arms
- Face and neck
- Chest, shoulders, back and abdomen
- Feet and legs
According to this same author:
"During tension-relaxation exercises, the client, while tensing a certain group of muscles, should concentrate on the sensation of tension in that area of the body, trying to know, as best as possible, the points of maximum tension; afterwards, you must release the tensed muscles and concentrate on the difference between the previous tension and the situation present, trying to observe the small reductions that, progressively, occur at each instant at the points of maximum tension. In this way, with continued practice, the client learns, first of all, to detect states of muscle tension and relaxation in his own body; secondly, to be aware of the tension-relaxation sequence and, lastly, from previous knowledge, to voluntarily promote the state of relaxation. As can be seen, mind-body interaction is fundamental in the process and, in fact, the effects of progressive relaxation can be observed both on a physiological and cognitive level. "
Relaxation techniques model proposed by J.R.Cautela and J.Groden.
After an explanatory introduction of the purpose of relaxation, we will explain to the client the steps to follow in the relaxation training process:
"Once you are comfortable, you should begin to tense and relax muscle groups. When you tense a muscle, try to notice in which particular area you feel the tension. It is very important that you achieve the maximum degree of tension possible, as much as you are able to achieve for each group of muscles. Then focus on how you feel when your muscles are relaxed. The sequence, therefore, is as follows: (1) tense the muscles to their maximum degree, (2) notice in all muscles the sensation of tension, (3) relax and (4) feel the pleasant sensation of relaxation. When tightening a particular area of the body, he should keep the rest of the body relaxed. This will be difficult at first, but with a little practice you will succeed. If he has problems with a particular area, such as the muscles of the face or head, practicing in front of a mirror may be useful [...].
When you first practice relaxation, you should make sure that you allow enough time to feel both the tension and the relaxation sensation. We recommend that you hold each part of your body tense for about five seconds and focus on feeling the sensation of relaxation for at least ten seconds. Some parts of your body may take longer than others (for example, your back usually takes longer than your arms). Longer periods of time should be allowed for these particularly difficult areas. When you think you are taking enough time to examine your feelings of tension and relaxation, withdraw progressively your attention to this point so that you can focus specifically on the feelings of tension and relaxation. "
After all the appropriate clarifications on the subject at hand, we proceed to the training practice following the following scheme.
Muscle relaxation technique.
To begin the relaxation, choose a comfortable place, with dim lighting and without too much noise. The basic relaxation steps They are:
- Tension 5-7 seconds.
- Relax 15-20 seconds.
You need to focus first on stress as unpleasant and then on relaxation as pleasant. Here are the steps to relax each part of the body.
Relax your arms.
Follow these steps to relax your arms.
- Right arm: Tense the hand... relax.
- Left arm: Tense the hand... relax.
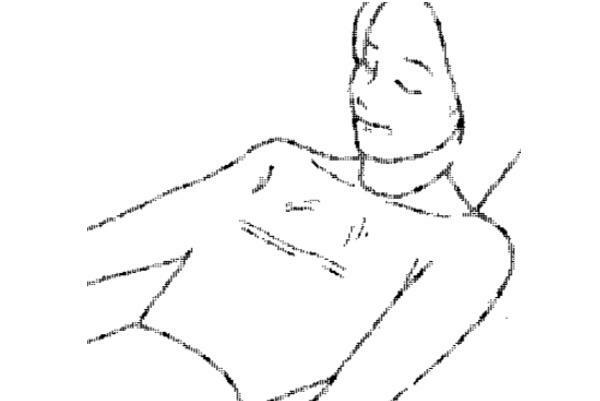
How to relax the chest.
Tense the chest holding in air... relax by expelling the air.
Then focus on relaxation, breathing normally and leaving the chest muscles loose, relaxed, without tension.
Relaxation of the stomach.
Tighten the stomach muscles by squeezing the stomach inwards... hold on... relax.
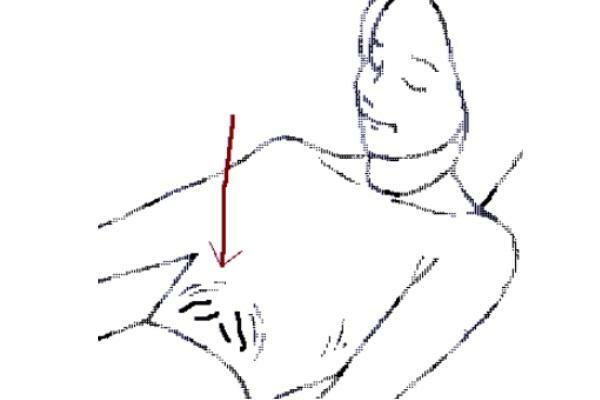
Relaxation of the muscles below the waist.
Tighten the muscles below the waist by pressing the buttocks against the chair 5-7 seconds... relax and focus on the relaxation that occurs in these muscles, letting them loose, without tension.
How to relax your legs.
- Right: Tense raised feet up... relax.
- Left: Tense... relax.
Relaxation of the face.
Relax the forehead
Tighten the forehead by raising the eyebrows up... relax. Focus on relaxation.
Relax eyes
Tense your eyes by closing them and squeezing them tightly... relax.
Relax the nose
Tighten your nose by lifting it up a bit... relax it.
Relaxation of the mouth
Tense your mouth by pressing your lips against each other... relax. Focus on relaxation by leaving your muscles loose and without tension.
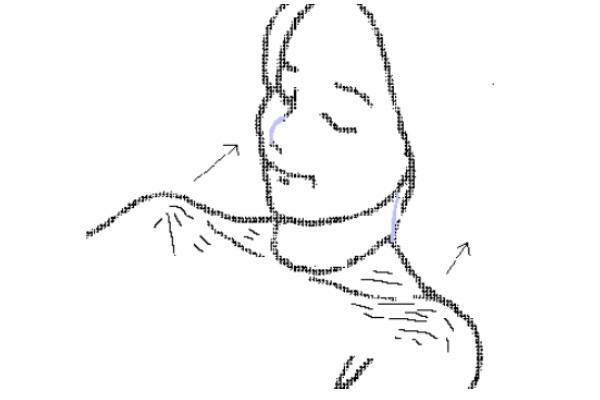
Relax the neck.
Figure 9. Mouth. Neck: (See figure 10) Tense the neck, pressing the head strongly against the chair or bed (5-7 sec.)... Relax (15-20 sec.), Focus on the feeling of relaxation that occurs when we relax our muscles.
Shoulder relaxation.
- Exercise 1: Tense your shoulders first, pulling them towards your ears as much as possible... relax.
- Exercise 2: Tense your shoulders by pressing them hard back (on the couch or bed)... relax.
Lastly, practice breathing techniques. Taking in air holding it for a few seconds and then releasing while mentally repeating the word "relax" and releasing all the muscles of the body. Repeat all the proposed exercises but without tensing, simply relaxing each of the parts described.
Stage 1 of the model proposed by T. Carnwath and D.Miller.
These authors propose a learning model divided into 3 parts. The first consists of a respiratory control; the second is the progressive relaxation itself; the third is a meditation technique with visual images. The model is as follows, starting with stage 1:
The method involves focusing attention, first, on the breath. With your eyes closed, notice how your breathing slows down to an easy and regular rhythm. This is the natural respiratory rhythm, it does not require any effort on the part of the individual, it occurs on its own. By looking at your natural breathing rhythm, it can be helpful to visually imagine your chest rising and falling as you breathe in. and breathe out..., breathe in... exhale... It is only a matter of calmly observing the natural respiratory rate for three minutes.
Stage 2 of the relaxation model of T. Carnwath and D. Miller.
In the next stage of the complete relaxation method, muscle tension and relaxation are practiced. Using the natural respiratory rate as a guide, they will tense and then relax muscle groups of the whole body. It will be done twice for each muscle group. What is important to remember is that your muscles tense when you breathe in and relax when you breathe out. Therefore, when you breathe in, you have to tense a muscle group by contracting the muscles 75% of everything they can contract, without causing pain or cramps. Tension is held for two inhalations, then as you exhale, the tension is released. Allow it to suddenly release when you breathe out, as if it were being pushed out of the body. If there seems to be some tension remaining, expel it with the next exhalation. Remember to continue to breathe naturally by retaining tension and to only tense one specific muscle group at a time. Another tip: when exhaling, releasing the tension, say the word "relax" to yourself (mentally), so that the relaxation is mentally associated with the breath and the word "relax". After relaxing the muscle group, notice the difference between tension and relaxation and how relaxed muscles feel soft, warm, and heavy when you "breathe out" the tension.
Here is a list of the important muscle groups to relax. They should all be followed in the order indicated, tensing and relaxing each group twice before moving on to the next:
- Hands. Tense your hands by clenching your fist and squeezing. Relax. Repeat.
- Forearms Fold your hands at the wrists, stretching your fingers up. Relax. Repeat.
- Biceps. Try to touch the shoulders with the respective fists, tensing the biceps (forearm). Relax. Repeat.
- Shoulders. Raise your shoulders as if you wanted to touch your ears. Relax. Repeat.
- Front. Raise the eyebrows as much as possible. Relax. Repeat.
- Face. Wrinkle your nose and close your eyes (squeezing them). Relax. Repeat.
- Lips. Press your lips against each other. Relax. Repeat.
- Language. Press the tongue against the roof of the mouth. Relax. Repeat.
- Neck. Press your head against the back of the chair or against the pillow. Relax. Repeat.
- Chest. Breathe in deeply so that the chest muscles expand. hold your breath for five seconds and then breathe it out. Allow the breathing rate to return to normal and repeat the cycle.
- Stomach. Tense, keeping inwards, the stomach muscles "drawing" towards the spine. Hold it like this for five seconds and relax it. Allow breathing to normalize and repeat.
- Back. Make an arch with the back (separating it from the chair). Relax. Repeat.
- Legs and thighs. Lifting your legs from the chair or bed, tense your thigh muscles. Relax. Repeat.
- Calves and feet. Raise your toes back, tensing your calf muscles. Relax. Repeat.
By the end relaxation of each muscle formNotice the difference in releasing tension, how good it feels to be relaxed, hot, and heavy, for a change. After completing the muscle relaxation sequence, feel your whole body lying down, heavy and relaxed, sinking into the chair or bed. Remain lying down while continuing your natural breathing rhythm effortlessly.
Stage 3 of the relaxation model of T. Carnwath and D. Miller.
In the third stage of complete relaxation You try to gradually remove your mind from the stresses of everyday life, while continuing to be alert and awake. In other words, this stage involves relaxation of the mind, in addition to that of the body. The best way to do this is to choose, before starting the relaxation session, a favorite image or memory that can be explored for five or ten minutes in this last stage. Many people find the image of lying on a warm, sunny beach very relaxing. If this image is chosen, the senses should be used to make the most of this sensation. One can imagine hearing the sound of the waves gently crashing against the shore, the sound of seagulls flying, or feeling the warm sensation of the sun on the skin, the gentle sea breeze, the body lying on the hot sand, the blue of the sea speckled by the sun, the color of the sand, the shape of the clouds that pass through the sky, the fragrance of fresh sea air, the feeling of peace and tranquility and well-being that comes from being away from it all, alone and satisfied on this beach wonderful.
Other relaxing images or scenes could be the fact of being in the field in spring with its sights, sounds, textures, smells and sensations characteristics, or a favorite food or any memory of a vacation with enough power and interest so that they can be explored, enjoying For a while. The most important thing is to recreate the chosen image as deeply as possible, experiencing its sounds, sights, shapes, temperatures, colors, smells and sensations. You have to remember that you are relaxing and enjoying yourself, releasing all tensions by "floating" within the image.
After completing the third stage, you should lie down for a few minutes without making any major movement, then open slowly awareness to the sounds in the room and to the sensation of the body, pressing down and starting to get up slowly, without no sudden sudden movement. "As can be seen, in this scheme the authors give room to the imagination as a way of deepening the relaxation.
This article is merely informative, in Psychology-Online we do not have the power to make a diagnosis or recommend a treatment. We invite you to go to a psychologist to treat your particular case.
If you want to read more articles similar to Bernstein and Brokovec relaxation techniques, we recommend that you enter our category of Meditation and relaxation.