A conceptual map is a graphic that serves to contextualize concepts and unite them through arrows that indicate a certain relationship between them.
One of the tools most used by students is Word, from Microsoft Office. In this article we will explain how with some simple tools of this program, we can make a concept map in Word.
Advertisements
In this article you will find:
Step by step Concept Map in Word
Step 1
To begin we open a blank document of Word, we are going to "Insert" and select the form that we want to use. Generally for conceptual maps Eclipse is used. You can also select the rectangle or the rounded corner rectangle.

Advertisements
Step 2
Once the Eclipse is inserted, we go to the «Form Format» to give it a little design.

Advertisements
Step 3
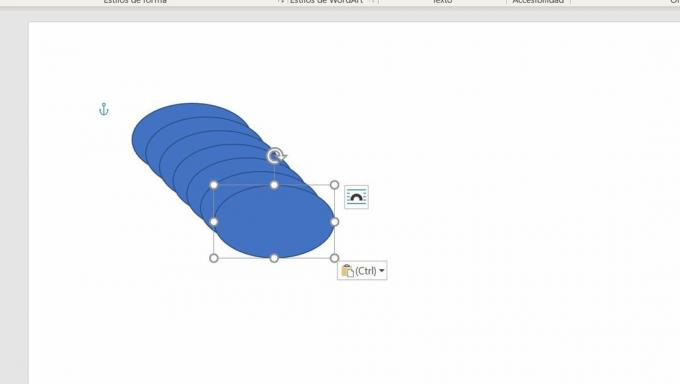
To facilitate the work, we copy and paste the chosen form several times to begin to accommodate them in the Word document.
Advertisements
Step 4
In this step the concepts are ordered and written within each Eclipse. The idea is to leave each concept in an approximate place within the document.

Advertisements
Step 5
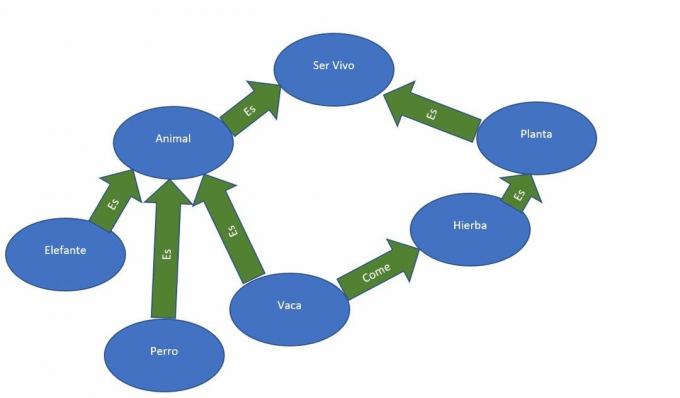
In this step, in order to unite the concepts of the concept map, the form "Arrow: to the right" is selected. It can also be «Arrow: to the left». The idea is that this arrow is the one that unites the concepts of our concept map.

Step 6
In step 6 and last step of our concept map in Word We are going to order all the arrows and eclipses conceptually giving the shape we want and that helps us understand our summary.

In this link you can find the Word with which we have written this article.
Concept Map Word Documents Editable
Have you ever made a concept map in Word? You can share your comments below!